Config split module tutorial for Drupal
Developer

Very often we as developers need to work with different environments. This could sometimes lead to (un)expected problems. In Drupal 8 we use the configuration system which works pretty nice, but there are cases where the settings for the local and any other environment should be different.
Let’s say we don’t want to allow the site administrators to use the Views UI and the DB log modules, but we need them for development. However, when we enable these and export the configurations, they will appear in the core.extensions.yml file, and on executing a configurations import in any of the other environments, they will be enabled. And we do not want that.
So, what’s the decision?
Well, we could always enable them for development and disable them before the config export. We could also export with the modules enabled and remove their entries from the core.extensions.yml before we commit. But … let’s be honest. Are we sure we can do this EVERY single time? I wouldn’t be that confident. And what if there are multiple entries we’d need to handle? It’s not very convenient, right?
Here's where the Configuration Split module takes place. Now I’m gonna show you a basic usage of that module.
First thing’s first. Let’s get it into our project:
composer require drupal/config_splitThen, let’s enable it via the UI or by executing:
drush en config_splitNote that it depends on another module – Config Filter, but this dependency is being handled automatically, so just make sure to confirm enabling both modules. Cool. So now we have a new section in the ‘Configuration’ tab under the ‘Development’ section and it is called ‘Configuration split settings’
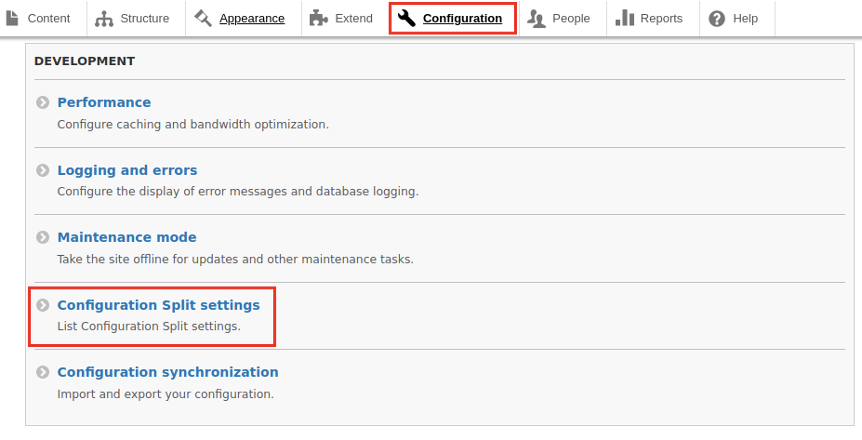
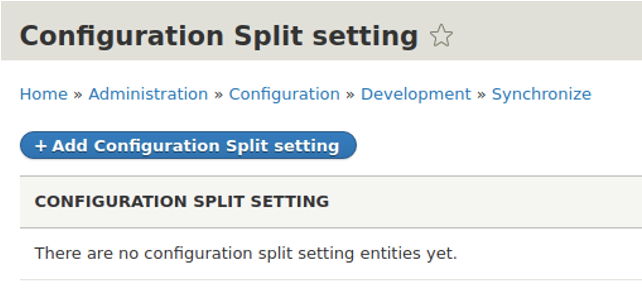
Now click on it or visit directly the ‘/admin/config/development/configuration/config-split’ url. The first thing you would see is that we don’t have any Configuration Split Settings yet.
OK – let’s create two – dev and prod. But first, let’s put this in the ‘settings.php’ file:
$settings['config_sync_directory'] = '../config/sync';This means that the configurations would be in the root directory under a folder called ‘config’. It will have a subfolder ‘sync’, holding all the master configurations. Now when we execute:
drush cexWe already have a config/sync directory, holding all configurations.
Before proceeding any further, let’s create our special subfolders inside that ‘config’ folder. Let’s name them ‘dev’ and ‘prod’. The result should be this:
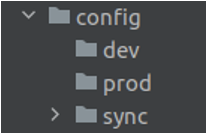
We’re now ready to create our configurations.
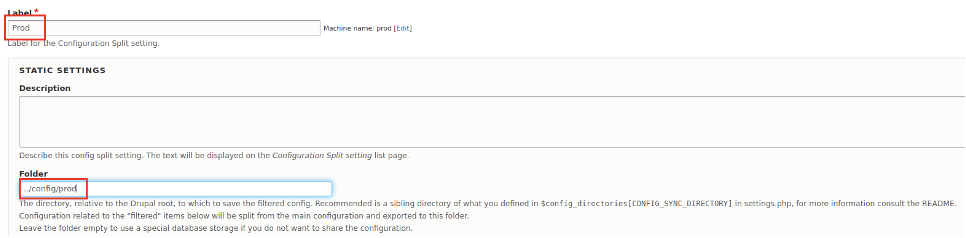
Let’s get back to the site, press that big button, and create the first one. Fill ‘Dev’ in the Label field and ‘../config/dev’ (no need of the quotes) in the Folder field. Remember the folders we’ve created? Here’s where we use them. Press Save. Now we have the first configuration.
Let’s create the second one. Repeat the previous step by filling ‘Prod’ and ‘../config/prod’ in the corresponding fields. Great. We’re almost done.
Now let’s enable the modules we want only for the development environment. Let’s start with Views UI and DB log if they are not enabled already. If they are, let’s go to the next step. Visit the ‘/admin/config/development/configuration/config-split/dev/edit’. Let’s navigate to the ‘Complete split’ section, scroll down to the ‘Database Logging’ and check it. Then let’s scroll down to the ‘Views UI’ and check it.
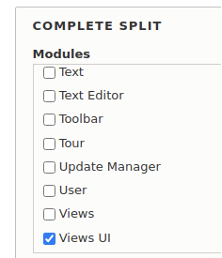
We usually work only with this ‘Complete split’ section for both modules and configuration items. We’ll talk about the others later. Now let’s save. Great. We have to export our configurations.
drush cexIf we now check the ‘sync’ directory, we’d see something like this:

Our dev environment folder holds the information about our changes.
Here comes the most confusing part of the work with this module. If we check the Configuration Split overview page again, we’ll see two active configurations.

So how should we distinguish between them? Hmm. Let’s take a step back – how does this hurt? We created them, right? Well, yes, but we need only one of them in each environment. On the local machine, we need the dev one and any of the test/stage/prod would need their own configuration. However, when they are all active, there is no real separation. So, what could we do? The answer is that we need to overwrite them programmatically with the settings.php file. Let’s start by creating a variable called ‘$env’ and set its value to ‘dev’. This could be taken from an environment variable. It could be placed in an ignored settings.local.php file or whatever other method fits our use case. For now, we’ll switch it manually. So let’s add the following lines in our settings.(local.)php:
$env = 'dev';
switch ($env) {
 case 'prod':
 $config['config_split.config_split.dev']['status'] = FALSE;
 $config['config_split.config_split.prod']['status'] = TRUE;
 break;
 case 'dev':
 default:
 $config['config_split.config_split.dev']['status'] = TRUE;
 $config['config_split.config_split.prod']['status'] = FALSE;
 break;
}
Let’s refresh the overview page now.

That’s better. Now we only have a single active configuration. In case there are more than just these, they should be overwritten in the same way. We always want to have a single active configuration.
Let’s now switch the value of the ‘$env’ variable to ‘prod’ and pretend we’re on the server. We will have the above settings reversed.

Now let’s go and disable the modules, export the configurations and clear the cache:
drush pmu views_ui dblog
drush cex
drush cr
OK, let's try if it works. Now in the prod environment, we don't have them. But will they appear when we go back to the dev one? Let's revert the ‘$env’ back to ‘dev’. Do not forget to clear the cache. Let's import the configurations.
drush cr
drush cim
Yay, they are back! The Views UI and DB log modules are already disabled by default on any other environment except the ‘dev’ one. Now we can forget about managing these modules separately. Isn't that cool?
Once we have this setup, it's really easy to use it. This is how an entire module is being set up. In the same way, we may use any configuration as well. Like ‘system.mail’ or any block. Or like ‘comment.settings’. Let's also remove the CSS and JS aggregation. They are under Configuration -> Development under the Bandwidth optimisation. Let's uncheck the two of them.
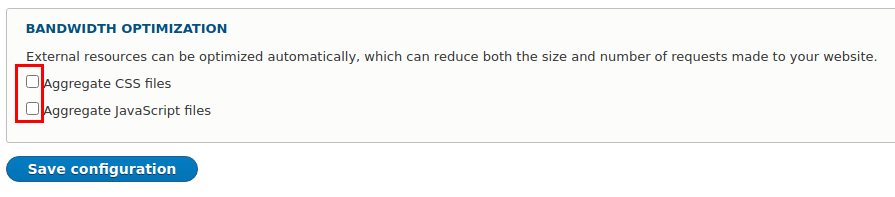
Let's go back to the Dev part of our configuration split and find the ‘system.performance’ entry under the Complete Split -> Configuration items, check it, and save. This will make sure that the development environment won't have aggregation. We could also put records manually here. Do not forget to export your configurations once you're ready with them. That's it. Easy, right?
The last remaining part is the conditional split section of our configuration. Before we make any changes there, let's find out what's the difference between ‘Complete split’ and ‘Conditional split’. If you take a look at the description of each of these sections, you'd notice that the first one says:
“Complete Split: Configuration listed here will be removed from the sync directory and saved in the split directory instead. Modules will be removed from core.extension when exporting (and added back when importing with the split enabled.)"
And the other one is:
“Conditional Split: Configuration listed here will be left untouched in the main sync directory. The currently active version will be exported to the split directory.”
So, this means that by putting anything in the Complete split section, this configuration disappears from the master directory(i.e. /config/sync), while the conditional one doesn't remove it. It holds both values and applies the different ones only when needed. There is even an option to separate conditionally only if the setting is actually different from the master one. This could also be very handy. Another benefit is that we can export dependant configurations with the conditional split:

So, that's all! I hope you find this tutorial useful!
Share this article:
Thank you for subscribing!
Transform your Drupal website with our expert configuration split solutions. Contact us today to unleash its full potential!