Share this article:

What is WebP and what are it's advantages?
For a long time, JPG has been placed as a standard for image data on the web. However, in 2013, Google (together with a group of other open source developers) were able to develop WebP, a new picture encoder technique that intended to compress images smaller than JPG while maintaining image quality.
WebP is a contemporary image format for the web that offers greater lossless compression. Webmasters and web developers can use WebP to create smaller, richer images that load faster on the web.
When compared to PNGs, WebP lossless images are 26% smaller. At the same SSIM quality index, WebP lossy images are 25-34 percent smaller than equivalent JPEG images.
Transparency is supported by lossless WebP at a cost of only 22 percent more data. When lossy RGB compression is acceptable, lossy WebP also offers transparency, resulting in file sizes that are typically three times less than PNG.
Read Frequently Asked Questions about WebP.
How to implement WebP format for all the images on a Drupal 9 website?
There are 3 main steps to follow:
- Configure server webp format support.
- Install and configure Imagemagick and WebP Drupal modules.
- Add “Convert to WEBP” effect to relevant image styles.
1. Configure server WebP format support.
We need to make sure we have the server WebP support. For our purpose we can use two different php extensions, imagick and gd. They both support converting images to WebPformat. The difference is only in configurations in next steps. First we will cover the gd extension and after that we will look at imagick.
GD extension:
First you need to check your php.ini file. You must find:
extension=php_gd2.dllor
xtension=php_gd.dll.And after that restart your server to apply changes. If you can`t find this extension in your php.ini file, you need to add it to your environment.
It will look like this:
sudo apt-get update
sudo apt-get install php-gd
GD extension: DDEV environment you need to configure DDEV Hook. You can set hook post start adding additional settings in .ddev/config.yaml.
hooks:
post-start:
- exec: sudo apt-get update
- exec: sudo apt-get install php-gd
By using hooks you’re able to run linux commands into the DDEV environment.
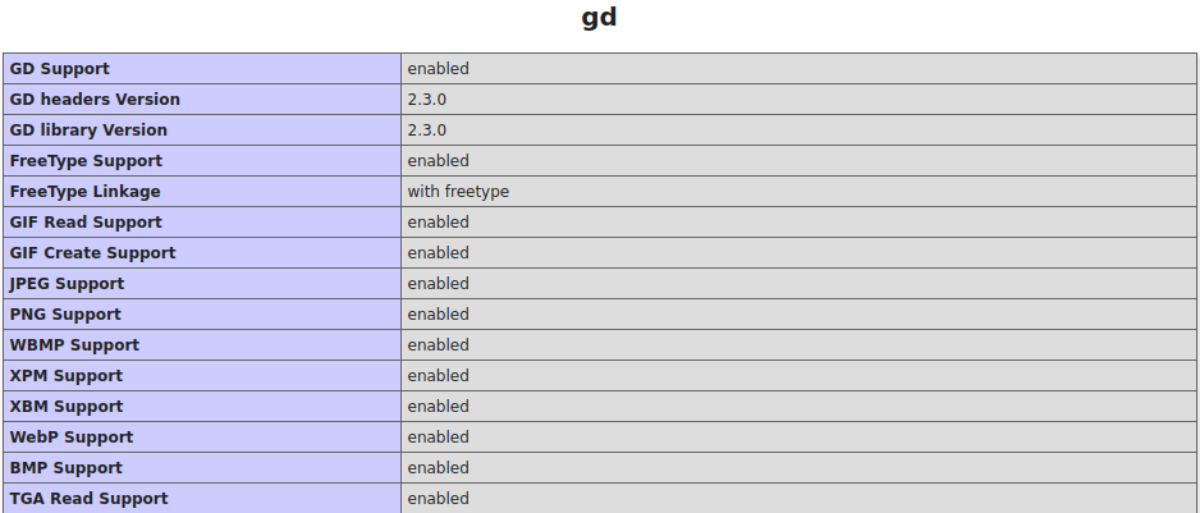
If you’ve done these steps described in this section correctly, you will see a new block in phpinfo().
It will look like this:
This section will show you that the gd extension was installed successfully. You need to check here, if WebP support is enabled.
Imagick:
Imagick is another library that you can use for image manipulations. The installation imagick is pretty much based on what we saw in the previous section.
sudo apt-get update
sudo apt-get install php-imagick
Or DDEV example:
hooks:
post-start:
- exec: sudo apt-get update
- exec: sudo apt-get install php-imagick
You can check if imagick is installed successfully by using the command below
php -m | grep imagickAfter the last manipulation you will need to restart your web server, most probably apache.
If all done the right way, you will see something like:
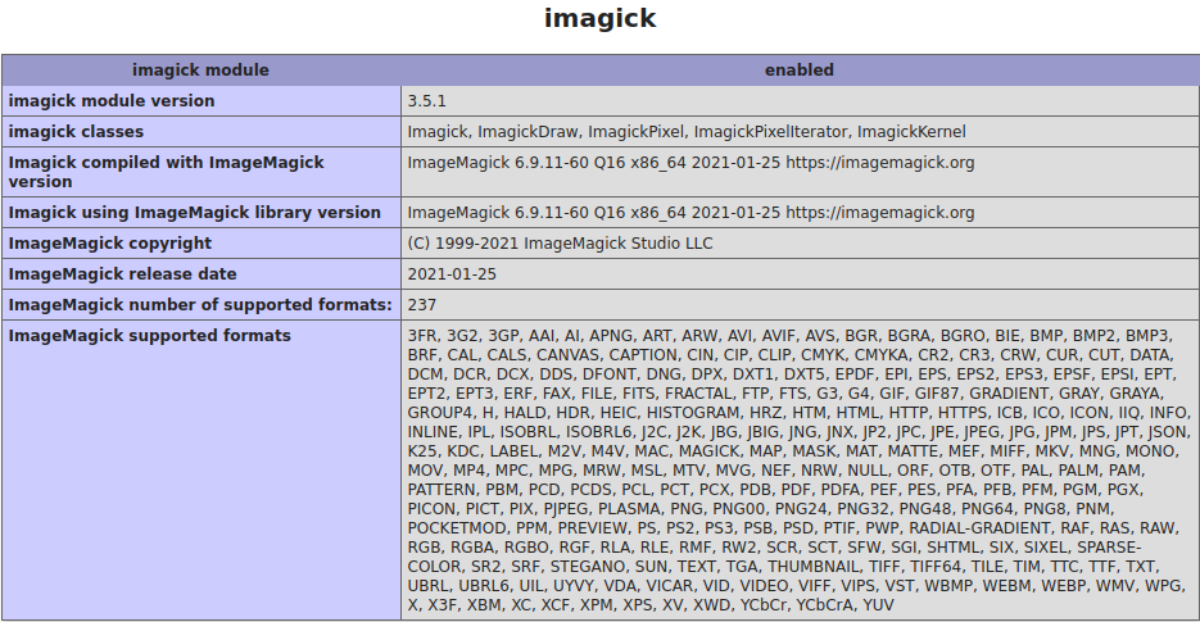
Note:
In the sections that are described above, you need to check if WEBP Support is enabled for PHP. If you can’t find WebP support or format listed in the previous section you’ll need to install it manually via this command:
sudo apt-get update
sudo apt-get install -y webp
And again – restart your web server.
2. Install and configure Imagemagick and WebP Drupal modules.
So far so good, we already have a configured environment. I hope you completed the previous step without any problems. If not – please repeat!
Next we will look at two modules that we will need to install and configure to set image converting.
Good, let's proceed to installing the two modules we need. First one – Imagemagick.
composer require drupal/imagemagick
drush en imagemagick -yAnd the second one – WebP.
composer require drupal/webp
drush en webp -yAfter installing and enabling all modules run drush cr, to rebuild cache.
The WebP module provides the WEBP converter extension in the image style effects, which we’ll show a bit further. No configurations needed for the WebP module. We will configure the ImageMagick module instead.
The ImageMagick module has two ways of configuring. We will cover both in this section. In the previous section you chose some php library for image manipulation gd/imagick, at this point you will need to configure imagemagick module accordingly you choose.
First we will look at imagick configuration steps:
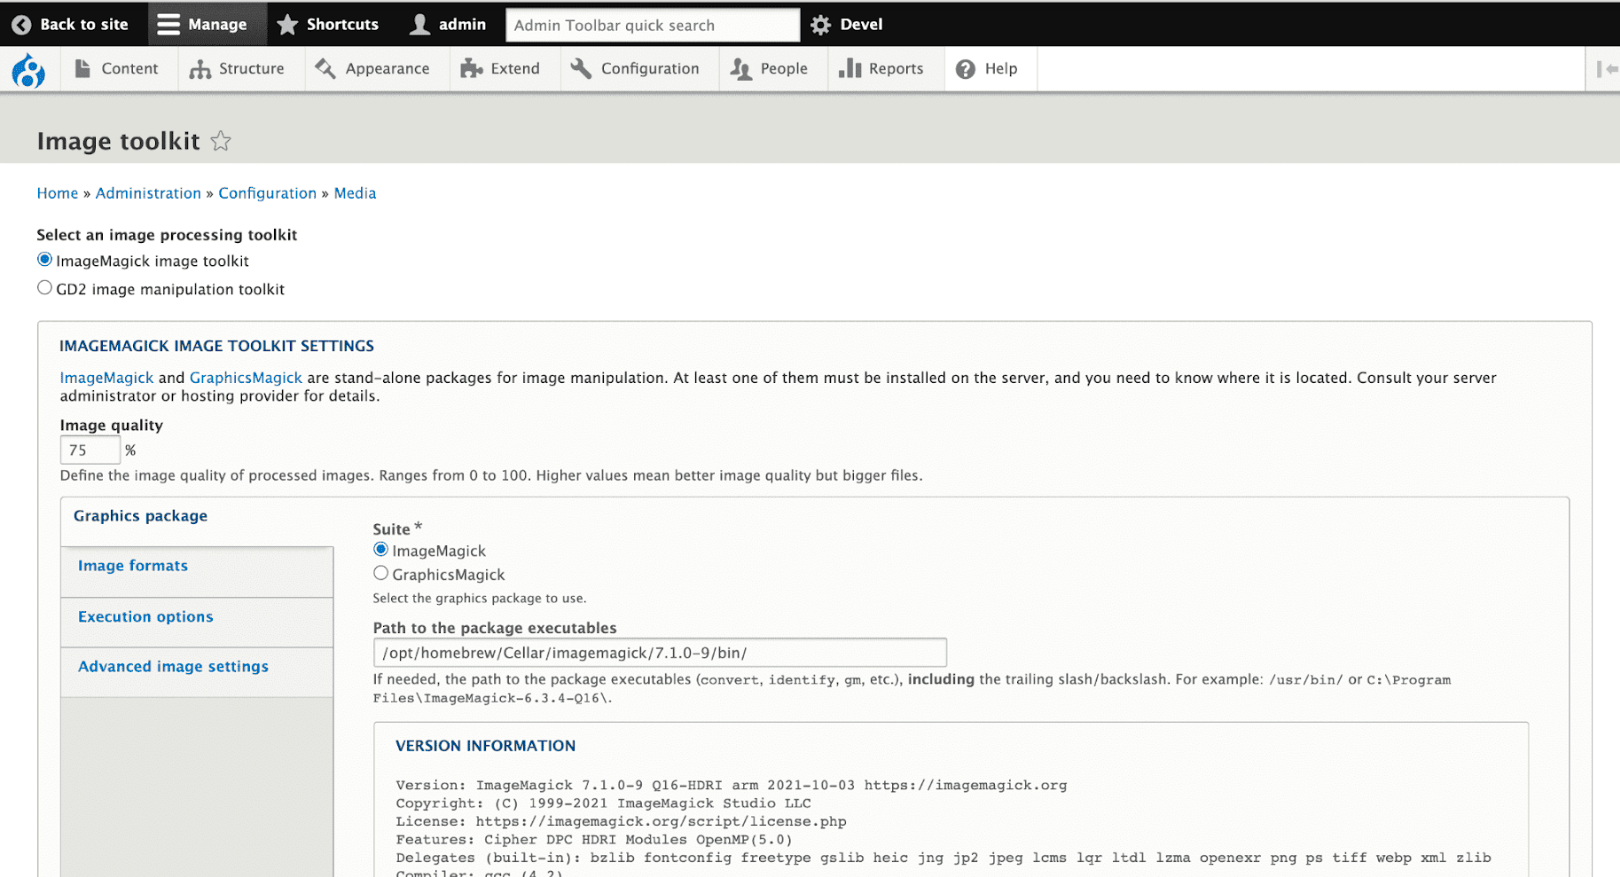
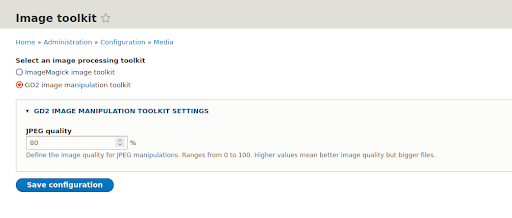
Navigate to: /admin/config/media/image-toolkit
If you choose the Imagick library you will need to choose the first option ImageMagick image toolkit. Also you need to set image quality.
Image quality option will reduce image quality to percent that you choose. Note that if you reduce the quality of the image too much the image will not look good. You will need to play around with this.
You also need to set a path to imagiMagick bin folder that will use module to convert images. You can download the extension based on your operating system. After that extract all from this folder in preferred location on your server. And enter the path to bin folder in image toolkit field “Path to the package executable” and that’s all.
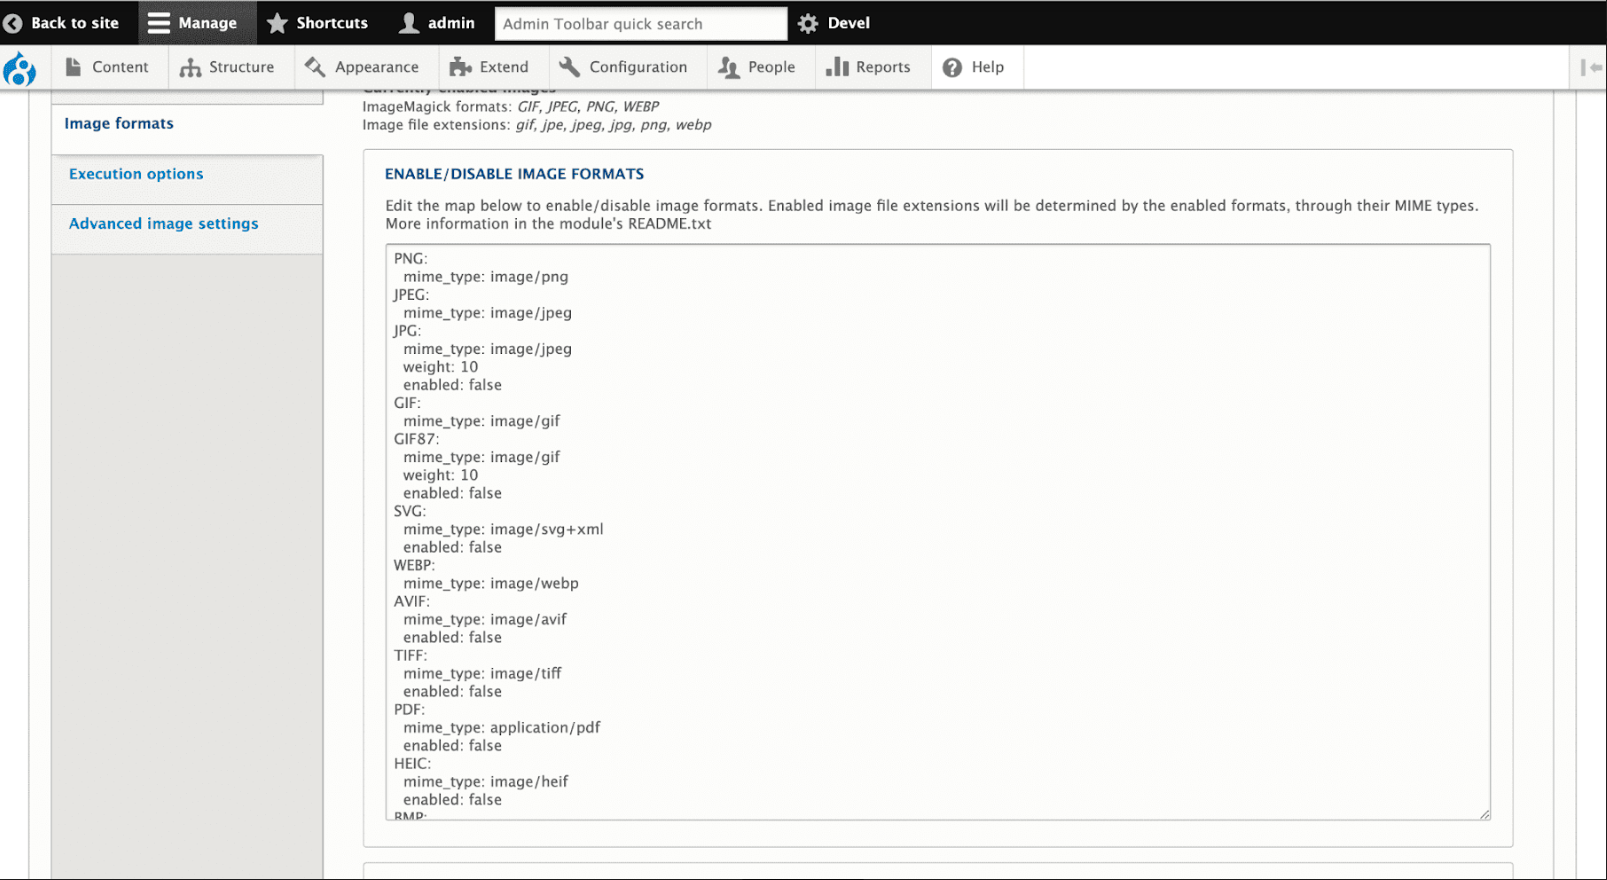
In the next step we need to set image formats that we will use. Note that you can enable or disable image formats that you want to use.
Now let's look at how to configure imagemagick with GD2 extension:
If you choose gd processor for manipulation with images, you need only to set “GD2 image manipulation toolkit" in image toolkit options.
Don't forget to run drush cr after applying module settings to rebuild drupal cache.
3. Add “Convert to WEBP” effect to relevant image styles.
Okay, we already have WebP support on our server, now we need to set up converting images to WebP format by adding converters in all image styles.
Open : /admin/config/media/image-styles, And create a new image style.

And enter a name, for example “Image process”.
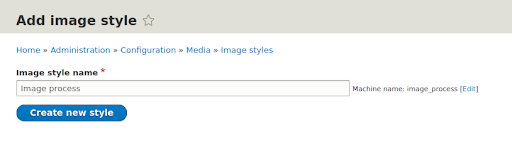
And click Create new style.
In this new image style we need to create a converter for our images.
Select convert from dropdown and click add.
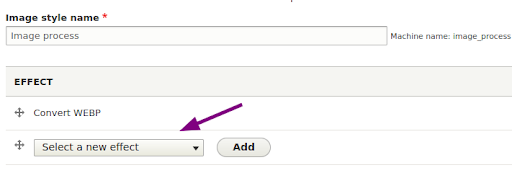
On the next page select WebP option from dropdown and click Add effect. The already installed WebP module gives us the WEBP extension here:

If you want to apply the new effect to any existing image styles – use the same approach.
Bonus: Apply newly created image style in Twig
At this point we need to understand the WebP format will be applied only for images that use an image style. For all other cases we’d need to apply image style manually in the code. For example – in twig. Most probably the images implemented there don’t use any image style. Fortunately enough, we’re able to apply a particular image style directly in Twig.
To catch images that we added in style like background or in twig template we need to set image style using image_style() twig function using the ‘image_process’ image style we’ve created before. Please note that we must seed the image style machine name in the image_style() function.
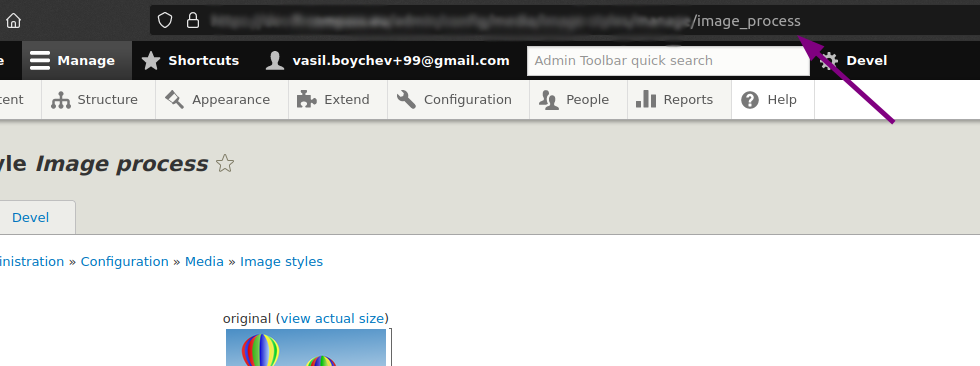
To find the machine name of your image style that we already created you need to open image style in the Drupal 9 admin panel and look at the url.
You will see something like:
The last argument in url is the your image style machine name that you can use as a parameter to image_style().
If we want to add image style in css in twig background it would look like:
background-image: url({{'public://image_folder/image.jpg' | image_style('image_process')}});To get images folder you need to use public:// variable that represents the public files destination, usually it’s ‘sites/default/files’.
Or if you want to add image style to twig field uri, it would look like:
background-image: url('{{ file_url(content.field_image.0['#media'].field_media_image.entity.fileuri | image_style('image_process')) }}');Note:
If you want to use this with a twig media field, you would need to get media field uri.
In Conclusion
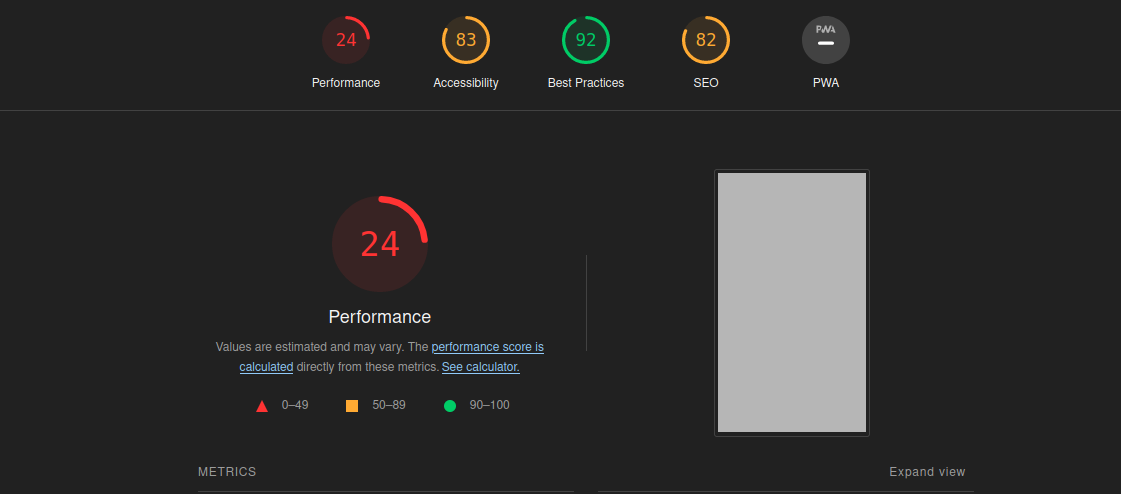
WebP is able to take data compression to a new level thanks to the inclusion of a prediction mode to the JPG process, making it clear to see how it can outperform its JPG-based relative. And we have the results to prove it
Before
After
Before
After
SUBSCRIBE TO OUR NEWSLETTER
Share this article:


.png&w=3840&q=75)